Lecture 0 - Installation
Formål: Installasjon og introduksjon til C++.
Requirements
You need VScode, Platformio and preferably STM32CubeMX.
- VScode is going to be the IDE, where we write our code.
- PlatformIO is an extension that allows us to compile our code and send it to our STM32-Nucleo board.
- STM32CubeMX is a software that allows us configure the pins on the board using a GUI, which will make the initial programming tasks much easier.
Install VSCode
- Download Visual Studio Code from https://code.visualstudio.com/download
- Choose the appropriate installer for your operating system:
- Windows: Download the “User Installer” (recommended) or “System Installer”
- macOS: Download the appropriate version for your chip (Intel chip or Apple silicon)
- Linux: Download the .deb (Debian/Ubuntu) or .rpm (Red Hat/Fedora) package
- Run the installer and follow the installation wizard
- Launch VSCode after installation
- (Optional) During first launch, you may be prompted to install additional components - these are recommended for a better development experience
PS: You can watch this video tutorial on how to install VSCode.
Install PlatformIO extension
Platformio is an extension for VSCode that allows you to write microcontroller codes and send them to your device. We will be using STM32F767 Nucleo board in this course, but you can program many more microcontrollers including Arduino using this powerful extension.
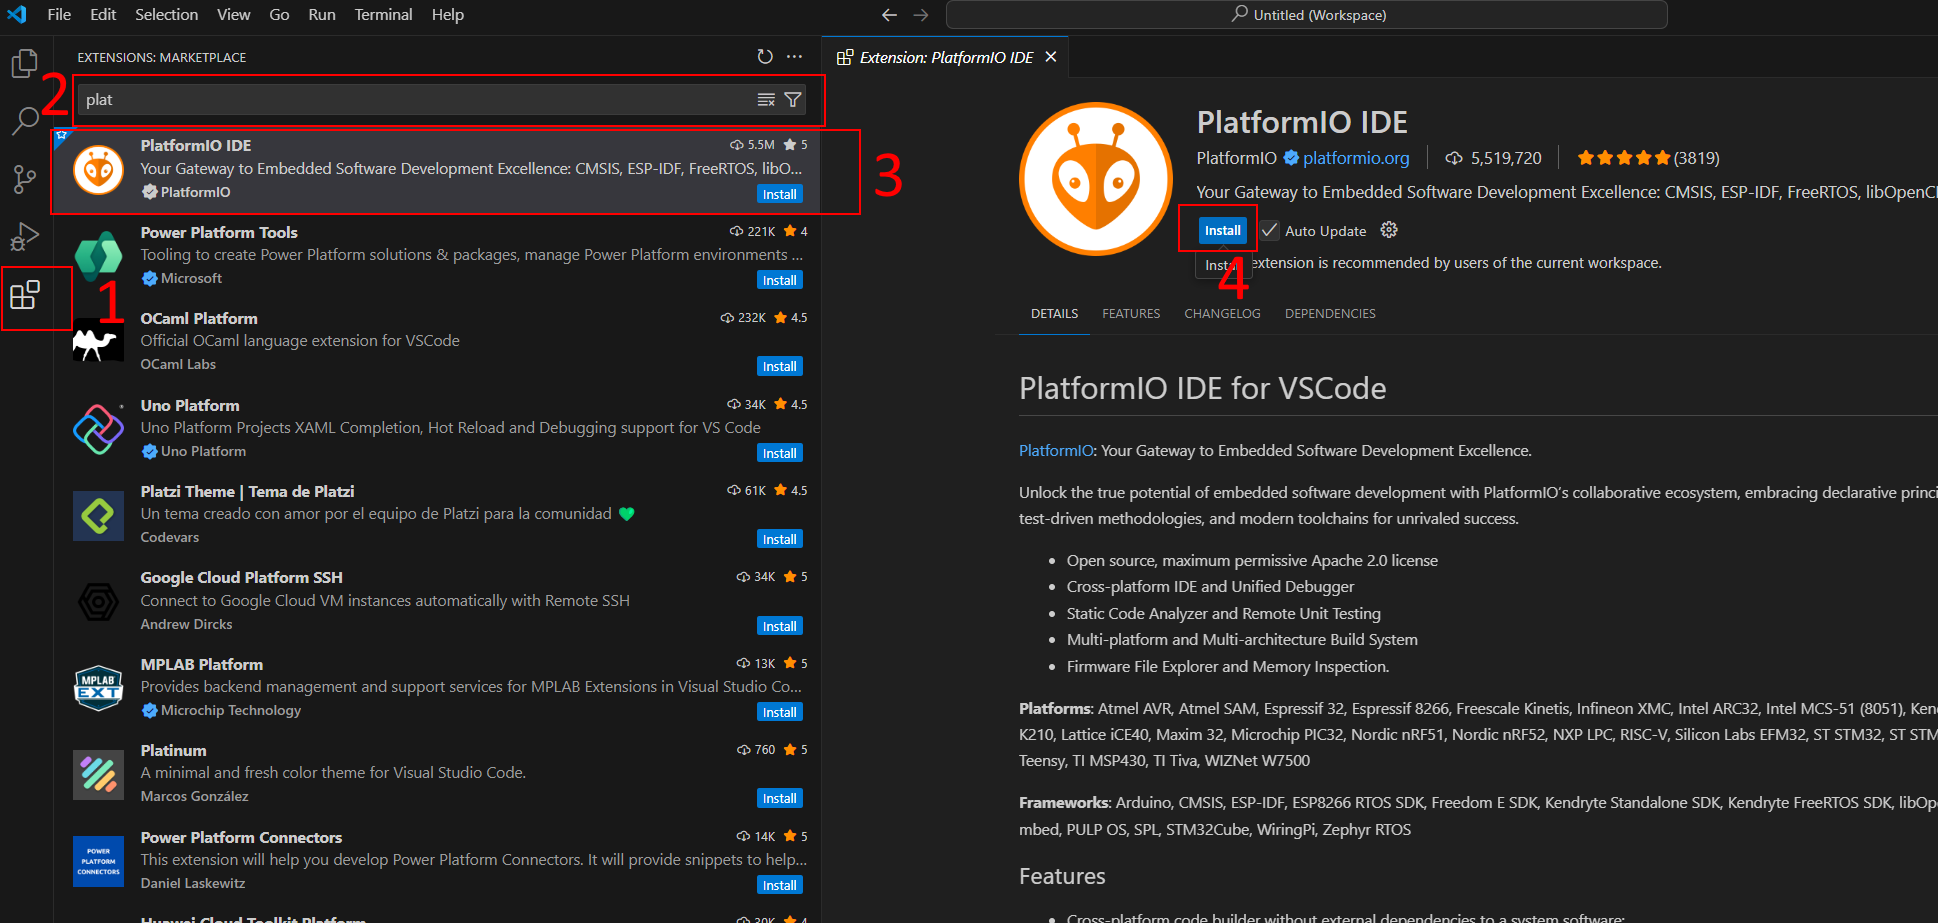
- Open VSCode
- Click on the Extensions icon in the left sidebar (or press
Ctrl+Shift+X) - In the search bar, type “PlatformIO”
- Look for “PlatformIO IDE” by PlatformIO
- Click “Install” and wait for the installation to complete
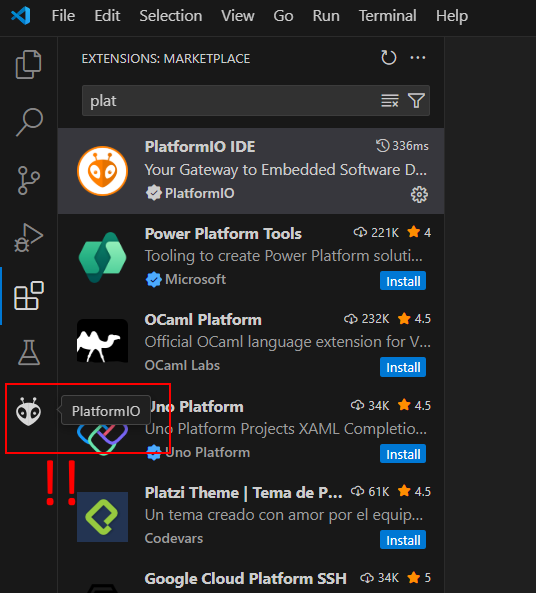
- After installation, you may need to reload VSCode
- Once reloaded, you should see the PlatformIO icon in the left sidebar
- The first time you open PlatformIO, it will download and install necessary tools - this might take a few minutes
Make sure that you see the PlatformIO icon on the left after the installation. If not, restart the VS Code.
Note: The first project creation might take longer as PlatformIO downloads all necessary libraries and tools. Subsequent projects will be faster.
Install STM32CubeMX
This is an interactive GUI developed by STM to easily assign roles to your microcontroller pins as well as do fine time-related modifications before you start a new project. It generated a template code and it will be very useful later.
- Download STM32CubeMX from ST’s official website
- Create an ST account if you don’t have one (required for download) or login your ST account.
- Choose the appropriate version for your operating system:
- Windows: Download the Windows installer
- macOS: Download the macOS package
- Linux: Download the Linux package
- Run the installer and follow the installation wizard
- During installation:
- Accept the license agreement
- Choose the installation directory (default is recommended)
- Select components to install (all are recommended)
- After installation:
- Launch STM32CubeMX
- The first time you run it, it will download additional packages
- This initial setup might take several minutes depending on your internet connection
- Once installed, you can start creating new projects by:
- Clicking “New Project”
- Selecting your board (STM32F767 Nucleo)
- Configuring pins and peripherals as needed
Note: Keep STM32CubeMX updated as new versions are released regularly with bug fixes and new features.
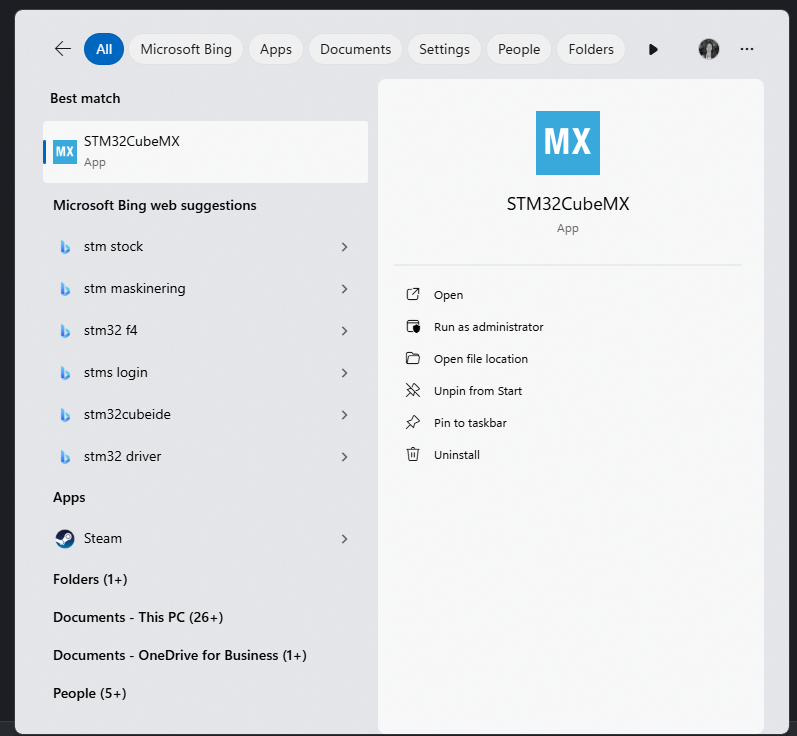
After the installation is completed, make sure that you can see STM32CubeMX in your apps.